Addressing Dimensional Accuracy Issues in CNC Machining Gears
One of the most prevalent problems we encounter in CNC machining gears is dimensional inaccuracy. Gears that do not meet the specified dimensions can lead to poor meshing, increased wear, and reduced overall performance in the machinery they are installed in. Several factors can contribute to this issue. Incorrect programming in the CAD/CAM software, such as errors in defining the gear geometry or setting the wrong machining parameters, can result in dimensional deviations.
To troubleshoot this, we start by carefully reviewing the design and machining code. We double – check the gear dimensions in the CAD model and ensure that the CAM software has correctly translated these into machining instructions. Another potential cause is tool wear. As cutting tools wear down during the machining process, they may remove less material than intended, leading to undersized gears. Regularly inspecting and replacing worn – out tools is crucial. We also calibrate the CNC machine axes regularly to ensure that the machine’s movements are precise. By systematically investigating these aspects, we can identify and rectify the root cause of dimensional accuracy issues in CNC machining gears.
Dealing with Tool Wear and Breakage in CNC Machining Gears
Tool wear and breakage are common challenges in CNC machining gears that can disrupt the production process and affect gear quality. The type of material being machined, the machining parameters (such as spindle speed, feed rate, and cutting depth), and the quality of the tool itself all play a role in tool wear. For example, machining hard materials like hardened steel with inappropriate tools or excessive cutting forces can accelerate tool wear.
When we notice signs of tool wear, such as a decrease in cutting efficiency or a rough surface finish on the gears, we first assess the machining conditions. Adjusting the spindle speed and feed rate to more suitable levels can often reduce the stress on the tool. If the tool is severely worn, we replace it promptly with a new one of the appropriate type and quality. In the case of tool breakage, which can be dangerous and cause damage to the gear blank or the machine, we analyze the cause. It could be due to incorrect tool clamping, excessive cutting forces, or a defective tool. By addressing these underlying issues, we can minimize tool wear and breakage, ensuring smooth and efficient CNC gear machining.
Resolving Surface Finish Problems in CNC Machining Gears
A poor surface finish on CNC machining gears can lead to increased friction, noise, and reduced fatigue life. There are multiple reasons why we might encounter surface finish problems. Inadequate cooling and lubrication during machining can cause the cutting tool to overheat, resulting in a rough surface as the material melts and re – solidifies unevenly. Also, vibrations during the machining process, which can be caused by factors like an unbalanced tool or a loose machine component, can create wavy or uneven surfaces on the gears.
To solve these issues, we first ensure that the cooling and lubrication systems are functioning properly. Using the right type and amount of coolant or lubricant can significantly improve the surface finish. We also check for any sources of vibration in the CNC machine and its setup. Tightening loose components, balancing the cutting tools, and adjusting the machining parameters to reduce vibration are effective measures. Additionally, fine – tuning the machining operations, such as increasing the number of finishing passes or using a smaller – diameter finishing tool, can help achieve a smoother surface finish on CNC machining gears.
Overcoming Gear Tooth Profile Deviations in CNC Machining Gears
Deviations in the gear tooth profile can have a detrimental impact on gear performance, leading to improper meshing and reduced power transmission efficiency. This problem can stem from inaccuracies in the gear – cutting tool, incorrect machine settings, or errors in the machining program. For example, if the gear hob is not properly aligned or has a worn – out tooth profile, it will cut the gears with incorrect tooth shapes.
To troubleshoot gear tooth profile deviations, we start by inspecting the gear – cutting tool. We measure the tool’s dimensions and tooth profile using specialized instruments and compare them to the specifications. If the tool is faulty, we either recondition it or replace it. Next, we review the machine settings, such as the hob – workpiece alignment and the cutting parameters related to tooth – cutting. Making the necessary adjustments to these settings can correct the tooth profile. We also verify the machining program to ensure that the tooth – cutting operations are programmed correctly. By taking these steps, we can overcome gear tooth profile deviations and produce high – quality CNC machining gears.
Handling Vibration and Noise during CNC Machining Gears
Vibration and noise during CNC machining gears not only create an unpleasant working environment but can also affect the accuracy and quality of the gears. As mentioned earlier, unbalanced cutting tools, loose machine components, and improper machining parameters can cause vibrations. These vibrations are then transferred to the gears, resulting in a noisy machining process and potentially uneven gear surfaces.
To address this issue, we conduct a thorough inspection of the CNC machine and its components. We tighten all the bolts and connections to ensure that there are no loose parts that could cause vibrations. Balancing the cutting tools, especially high – speed rotating ones, is essential. We use balancing machines to detect and correct any imbalances. Adjusting the machining parameters, such as reducing the spindle speed or increasing the feed rate gradually, can also help reduce vibrations. Additionally, installing vibration – damping devices, such as rubber mounts or anti – vibration pads, can isolate the machine from external vibrations. By minimizing vibration, we can also reduce the noise generated during CNC machining gears, leading to a more efficient and quieter production process.
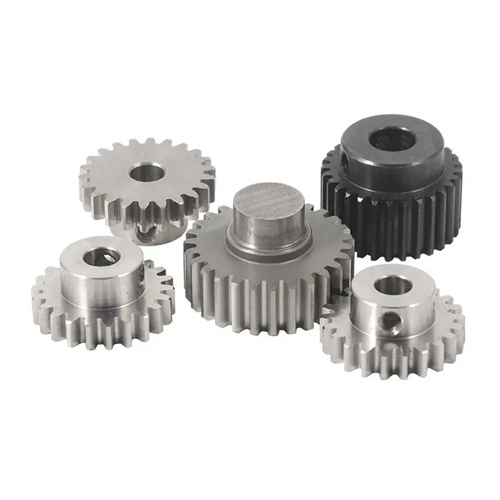
Preventing and Solving Chip – Related Problems in CNC Machining Gears
Chip – related problems, such as chip entanglement and chip – induced tool wear, can disrupt the CNC machining of gears. When the chips produced during machining get trapped between the cutting tool and the gear, they can cause scratches on the gear surface, damage the tool, and even lead to tool breakage. The type of material being machined, the cutting parameters, and the design of the cutting tool all influence chip formation and behavior.
To prevent chip – related issues, we select cutting tools with proper chip – evacuation features, such as tools with effective flutes or chip – breakers. We also optimize the machining parameters. For example, increasing the feed rate can help break the chips into smaller pieces, making them easier to remove. Regularly clearing the machining area of accumulated chips is also important. If we encounter chip – related problems, we first stop the machining process and carefully remove the trapped chips. Then, we assess whether the tool has been damaged and take appropriate actions, such as replacing the tool if necessary. By taking preventive and corrective measures, we can avoid chip – related problems and ensure smooth CNC machining of gears.