Worm gearing and worm sizing
A worm drive is a staggered gear transmission consisting of a worm and a worm wheel. It is used to transmit motion and power between two intersecting axes in space, typically at a 90° angle. Worm drives offer advantages such as high transmission ratios, compact structure, and smooth operation, making them widely used in machine tools, lifting machinery, metallurgical equipment, and other fields. The core of worm drive design lies in matching the parameters of the worm and worm wheel. Worm sizing is fundamental to ensuring transmission performance, and its dimensional parameters directly affect transmission efficiency, load capacity, and service life.
The basic parameters of worm gearing include module, pressure angle, lead angle, number of worm starts, and number of worm wheel teeth. These parameters are the prerequisites for calculating worm dimensions. Module is a fundamental parameter of worm gearing. National standards specify a standard module series for worm gearing (such as 1, 1.25, 1.6, and 2). The module determines the size of the worm and worm wheel. A larger module increases the load-bearing capacity of the gearing. The pressure angle generally refers to the axial pressure angle of the worm. The standard pressure angle is 20°. For power transmission, a 25° pressure angle can be used to increase load capacity; for indexing transmission, a 15° pressure angle can improve transmission accuracy. The lead angle is the angle between the worm helix and the axis. Its size is related to the number of worm starts and the pitch circle diameter. A larger lead angle increases the efficiency of the worm gearing, but also increases the difficulty of worm machining. The number of worm starts is typically 1-4. More starts improves transmission efficiency, but reduces the transmission ratio. A single-start worm can achieve a larger transmission ratio, but with lower efficiency, making it suitable for applications with large transmission ratios and low efficiency requirements. The number of worm gear teeth is determined by the transmission ratio and the number of worm starts, typically ranging from 28 to 80. Too few teeth will result in insufficient bending resistance, while too many will make the worm gear bulky and prone to undercutting.
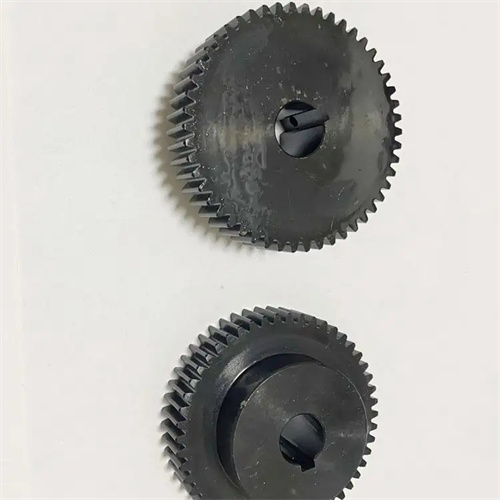
The main dimensions of a worm include the pitch circle diameter, addendum diameter, root diameter, lead, and worm length. These dimensions must be calculated using standard formulas based on basic parameters. The pitch circle diameter is a critical parameter of a worm. It not only affects the strength and stiffness of the worm but is also related to the lead angle. Its calculation formula is: pitch circle diameter d1 = m×q, where q is the worm diameter coefficient. The standard specifies a series of diameter coefficients corresponding to different modules (such as 8, 10, and 12). The addendum circle diameter dа1 is the diameter of the circle on which the worm’s tooth tops are located. The calculation formula is dа1 = d1 + 2ha*m, where ha is the tooth height coefficient (the standard value is 1). The root circle diameter df1 is the diameter of the circle on which the worm’s tooth roots are located. The calculation formula is df1 = d1 – 2 (ha + c)*m, where c is the top clearance coefficient (the standard value is 0.2). The lead, P, is the distance the worm helix travels axially during one revolution. It’s calculated as P = z1 × m × π, where z1 is the number of worm starts. The worm length, L, must be determined based on the number of worm wheel teeth and the number of worm starts to ensure effective meshing between the worm and the worm wheel. For a single-start worm, L is approximately (11 + 0.06z2) m (where z2 is the number of worm wheel teeth); for a multi-start worm, L is approximately (12.5 + 0.09z2) m. Furthermore, the worm length must be no less than 1.5 times the lead to avoid insufficient meshing.
The structural dimension calculation of the worm also needs to consider its strength and stiffness requirements. The worm is subjected to torque and bending moment during the transmission process. If the strength is insufficient, the tooth root may bend and break or the tooth surface may stick; if the stiffness is insufficient, a large deflection will occur, affecting the meshing accuracy and transmission smoothness. The strength calculation of the worm mainly includes the tooth surface contact strength and the tooth root bending strength calculation. The purpose of the tooth surface contact strength calculation is to prevent pitting or sticking on the tooth surface of the worm and worm wheel. The calculation formula is based on the Hertz contact theory. It needs to be calculated according to the transmitted load, the allowable contact stress of the material, and the geometric parameters of the worm and worm wheel. The strength requirements are met by adjusting the pitch circle diameter and module. The tooth root bending strength calculation is to prevent the worm tooth root from bending and breaking. It is necessary to compare the bending stress at the tooth root with the allowable bending stress of the material. For worms with fewer heads, due to the thinner tooth root thickness, the bending strength is usually the focus of the design. The calculation of the stiffness of the worm needs to take into account its deflection under load. Generally, the maximum deflection of the worm is required to not exceed 1/1000 of its span. If the deflection exceeds the standard, the diameter of the worm needs to be increased or a hollow worm structure needs to be used to increase the stiffness.
The calculated worm size must also match the worm wheel parameters to ensure correct meshing between the two. The module and pressure angle of the worm and worm wheel must be equal, which is the basic condition for achieving correct meshing. The lead angle of the worm and the helix angle of the worm wheel are equal in size and direction to ensure that the staggered angle between the two axes is 90°. The pitch circle diameter of the worm and the pitch circle diameter of the worm wheel must meet the center distance a = (d1 + d2)/2, where d2 is the pitch circle diameter of the worm wheel (d2 = m×z2). The size of the center distance must be determined according to the installation space and transmission requirements. The standard specifies a series of center distance values. In addition, the tooth width of the worm and the throat diameter of the worm wheel must also match each other. The tooth width of the worm should be sufficient to cover the effective meshing width of the worm wheel, while the throat diameter of the worm wheel must ensure a clearance with the worm tooth top to avoid motion interference.
In practical applications, the effects of machining processes and material properties must also be considered when calculating worm dimensions. The tooth profile of a worm is typically an Archimedean spiral, and machining methods include turning, milling, and grinding. For high-precision worms, grinding is required to ensure tooth profile accuracy and surface roughness. The worm material should possess high strength and wear resistance. Common materials include 45 steel and 40Cr. For high-speed, heavy-load transmissions, alloy carburized steels such as 20CrMnTi can be used, followed by carburizing and quenching to increase tooth surface hardness. The worm wheel material must exhibit excellent friction reduction and anti-adhesion properties. Common materials include tin bronze (such as ZCuSn10P1) and aluminum bronze (such as ZCuAl10Fe3). For low-speed, light-load transmissions, gray cast iron can also be used. Only by comprehensively considering transmission parameters, strength requirements, machining processes, and material properties can a reasonable worm dimension calculation be achieved to ensure safe and reliable operation of the worm drive.
