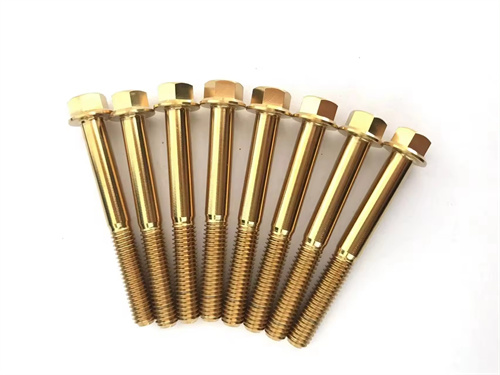
As the most commonly used thread type in mechanical connections, the tolerance and fit of common threads directly impact the reliability, interchangeability, and sealing of connections, and are key elements in ensuring the quality of threaded connections. The tolerance and fit design of common threads requires comprehensive consideration of the functional requirements of the thread (such as fastening, transmission, and sealing), the processing technology, and the operating environment. The desired fit is achieved through the rational selection of the tolerance grade, basic deviation, and threading length. According to the national standard GB/T 197-2003, “Tolerances of Common Threads,” the tolerance of common threads consists of the tolerance grade and basic deviation, and the fit types are categorized as clearance fit, transition fit, and interference fit. However, due to the special nature of threaded connections, clearance fit is predominant in actual applications, with tightness adjusted by controlling the mean diameter tolerance.

The tolerance grade of common threads is an important indicator of thread accuracy, used to control dimensional and form errors. Common threads are classified into seven grades, from high to low, based on precision: Grade 3, Grade 4, Grade 5, Grade 6, Grade 7, Grade 8, and Grade 9. Grade 6 is the basic grade and the most widely used. Threads of different tolerance grades are suitable for different applications: Grades 3-5 are high-precision threads, used in applications requiring high connection and transmission accuracy, such as precision instruments and machine tool lead screws; Grades 6-7 are medium-precision threads, used in general mechanical connections, such as automotive gearboxes and motor end caps; and Grades 8-9 are low-precision threads, used in applications requiring less-critical precision, such as agricultural and construction machinery. Tolerance grades primarily control the dimensional tolerances of the pitch diameter, top diameter (external major diameter, internal minor diameter), and root diameter (external minor diameter, internal major diameter). The pitch diameter tolerance is crucial for controlling the fit of the thread, followed by the top diameter tolerance, and the bottom diameter tolerance is generally looser. For example, the middle diameter tolerance of a grade 6 external thread with a nominal diameter of 20mm and a pitch of 2.5mm is 0.2mm, and the top diameter tolerance is 0.335mm; the corresponding middle diameter tolerance of a grade 6 internal thread is 0.28mm, and the top diameter tolerance is 0.53mm.

The basic deviation of common threads is used to determine the position of the tolerance zone relative to the basic dimension. There are two systems: internal and external threads. The basic deviation codes for internal threads are G and H, where H is the base deviation for a zero basic deviation and G is a positive upper deviation (i.e., the pitch diameter of the internal thread is larger than the basic dimension). The basic deviation codes for external threads are e, f, g, and h, where h is the base deviation for a zero basic deviation and g, f, and e are negative upper deviations (i.e., the pitch diameter of the external thread is smaller than the basic dimension). The choice of basic deviation depends on the thread fit requirements. Common fit combinations are H/g, H/h, and G/h. The H/g fit has a larger clearance and is suitable for applications subject to high temperatures, vibration, or frequent disassembly; the H/h fit has a medium clearance and is suitable for general mechanical connections; and the G/h fit has a smaller clearance and is suitable for applications requiring high centering accuracy. For example, for a coarse ordinary thread (pitch 2mm) with a nominal diameter of 16mm, the internal thread adopts 6H (basic deviation of the middle diameter is 0, tolerance is 0.236mm), and the external thread adopts 6g (basic deviation of the middle diameter is -0.038mm, tolerance is 0.17mm). After matching, the middle diameter clearance is 0.038-0.274mm, which can meet most connection requirements.

Engagement length is a key factor affecting the tolerance and fit of common threads. It refers to the axial length of the thread engagement portion. According to national standards, the engagement length of common threads is divided into short engagement length (S), medium engagement length (N), and long engagement length (L), with the corresponding length range determined by the nominal diameter and pitch of the thread. The longer the engagement length, the greater the cumulative error during thread processing, so a lower tolerance grade (i.e., a larger tolerance value) is required; the shorter the engagement length, the higher the tolerance grade can be. For example, for a common thread with a nominal diameter of 20mm and a pitch of 2.5mm, the Grade 6 tolerance corresponding to the short engagement length (11-26mm) is the same as the Grade 6 tolerance corresponding to the medium engagement length (26-45mm), but the Grade 6 tolerance corresponding to the long engagement length (45-80mm) needs to be increased by 1.2 times. When marking thread tolerances and fits, the medium engagement length can be omitted, such as “M20×2-6H” indicates a Class 6 internal thread with a medium engagement length; the short engagement length and long engagement length must be marked, such as “M16-6g-S” indicates a Class 6 external thread with a short engagement length.

The tolerance and fit notation for common threads must comply with national standards. Complete notation includes the thread characteristic code, dimensional parameters, tolerance zone code, and engagement length code. The notation format for external threads is “characteristic code nominal diameter × pitch – tolerance zone code – engagement length code.” For example, “M24×1.5-5g6g-L” indicates an external thread with a nominal diameter of 24mm, a pitch of 1.5mm, a tolerance zone of 5g for the pitch diameter, a tolerance zone of 6g for the top diameter, and a long engagement length. The notation format for internal threads is “characteristic code nominal diameter × pitch – tolerance zone code – engagement length code.” For example, “M30-7H-S” indicates an internal thread with a nominal diameter of 30mm, a coarse pitch (3.5mm pitch), a tolerance zone of 7H, and a short engagement length. When internal and external threads are mated, they should be marked as “Internal Thread Tolerance Zone / External Thread Tolerance Zone.” For example, “M20×2-6H/6g” indicates a mating of an internal 6H thread with an external 6g thread. In actual applications, the appropriate tolerance and fit should be selected based on the functional requirements of the threads, the accuracy of the processing equipment, and the production batch size. This ensures both connection quality and reduced processing costs, achieving a balance between technology and economy.
