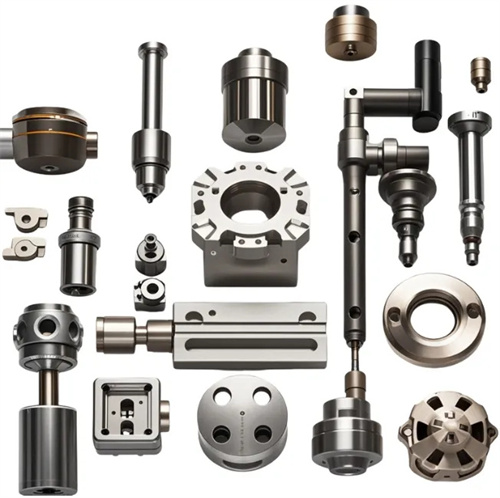
Machining of the Grinding Head Spindle in a Carburizing Grinding Machine
The spindle of a carburizing grinder’s internal grinding head is its core component, responsible for driving the grinding wheel at high speed for internal grinding. Its precision and performance directly impact the machine’s machining accuracy and stability. Typically manufactured from carburizing steel alloys such as 20CrMnTi, the spindle undergoes a carburizing and quenching treatment to improve surface hardness and wear resistance (surface hardness reaches 58-62 HRC), while maintaining excellent toughness (30-40 HRC) at the core. The spindle structure of a carburizing grinder’s internal grinding head is complex, often incorporating features such as precision journals, tapered surfaces, and threads. Machining operations require a balanced approach to protecting the carburized layer, controlling dimensional accuracy, and ensuring geometric and positional tolerances. Therefore, a rational machining process, along with appropriate tooling and cutting parameters, is crucial.
The machining process for the internal grinding head spindle of a carburizing grinder follows the principle of “roughing first, finishing second, soft finishing second.” A typical process is: blanking → forging → normalizing → rough turning → carburizing → quenching and low-temperature tempering → semi-finish turning of the non-carburized area → rough grinding of the positioning surface → finish turning of the carburized area → final grinding. Normalizing (air-cooling at 920-950°C) refines the grain size and improves cutting performance, laying the foundation for subsequent machining. During rough turning, most stock must be removed. After rough turning, sufficient stock must be left on the spindle’s outer diameter, end face, and inner bore (5-8mm for the outer diameter and inner bore, 2-3mm for the end face). Positional accuracy of all surfaces must be ensured to provide uniform stock for carburizing. Carburizing treatment uses gas carburizing. The depth of the carburized layer is determined according to the spindle size, generally 0.8-1.2mm. After carburizing, quenching (850-870℃ oil quenching) and low-temperature tempering ( 180-200℃ insulation for 2-3 hours) are required to obtain uniform martensitic structure and higher surface hardness.
Machining the carburized layer is a critical step in machining the grinding head spindle in a carburizing grinder. Care must be taken to protect the carburized layer and avoid excessive removal during machining. When semi-finishing and finishing the carburized zone, the cutting depth must be controlled to ensure the final carburized layer depth meets the required depth (generally, a grinding allowance of 0.3-0.5mm is allowed). Due to the carburized layer’s high hardness of 58-62 HRC, it is difficult to cut with conventional tools. Therefore, cubic boron nitride (CBN) or ceramic tools are required. CBN tools offer high hardness, excellent wear resistance, and the ability to withstand high cutting temperatures, making them suitable for continuous cutting of carburized and hardened steel. For example, the solid BN-S20 CBN tool can be used for finishing the carburized zone, achieving a surface roughness of Ra ≤ 1.6μm. Tool geometry should be optimized: the rake angle should be between -5° and 0° to enhance cutting edge strength; the clearance angle should be between 8° and 10° to reduce friction between the flank and the workpiece; the lead angle should be between 45° and 60° to reduce cutting forces; and the tool tip radius should be between 0.4 and 0.8 mm to prevent tip fracture. Extreme pressure cutting oil should be used for cooling during cutting to minimize tool wear and workpiece thermal deformation.
Machining of non-carburized areas primarily refers to areas that do not require carburization, such as the spindle center hole and inner bore. These areas are typically machined before carburizing, or the carburized layer is removed by turning after carburizing. The non-carburized area is made of the base material (20CrMnTi), which has a low hardness (approximately 200HB) before carburizing and quenching. Carbide tools can be used for turning. For rough turning of non-carburized areas, YG8 carbide tools are used, as they offer excellent toughness and can withstand high cutting forces. For semi-finishing and finishing, YT15 or TiAlN-coated carbide tools are used to improve wear resistance and surface quality. Tool geometry parameters include a rake angle of 10°-15° to minimize cutting distortion; a clearance angle of 6°-8° to improve tool life; and a lead angle of 75°-90° to reduce radial cutting forces. Cutting parameters include a cutting speed of 80-100 m/min, a feed rate of 0.2-0.3 mm/r, and a cutting depth of 2-3 mm for rough turning; a cutting speed of 120-150 m/min, a feed rate of 0.1-0.15 mm/r, and a cutting depth of 0.3-0.5 mm for finish turning. Extreme-pressure emulsion is used as the cutting fluid to effectively reduce cutting temperatures.
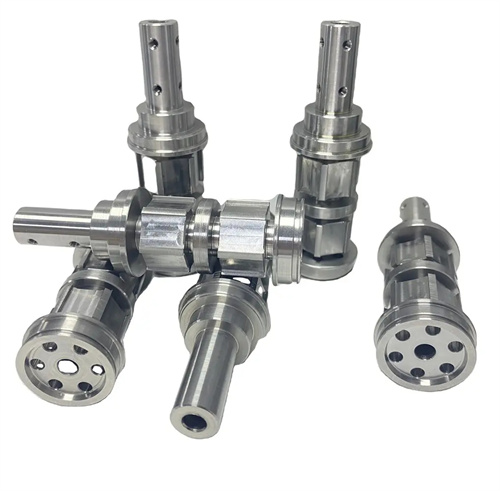
Controlling the geometric tolerances of the grinding head spindle in a carburizing grinder directly impacts its assembly and performance. Key geometric tolerances include: journal roundness ≤ 0.002mm, cylindricity ≤ 0.003mm; taper roundness ≤ 0.002mm, taper error ≤ 0.001mm/100mm; coaxiality between the journal and the taper ≤ 0.003mm; and perpendicularity between the end face and the axis ≤ 0.002mm/100mm. To control geometric tolerances, the following measures are required: Use a double-thimble clamping method to ensure spindle rotation accuracy; use a dial indicator to monitor radial runout and axial movement of the workpiece during turning, allowing for timely adjustments; perform an aging treatment after rough turning to eliminate internal stresses and reduce subsequent machining deformation; and complete multiple surface machining in a single clamping setup during finish turning, avoiding positioning errors caused by multiple clampings. For example, finish turning the spindle journal and taper in a single clamping setup ensures a coaxiality error of ≤ 0.002mm. After processing is completed, precision measuring tools (such as roundness tester and dial indicator) are required to check the form and position tolerances to ensure that they meet the design requirements.
