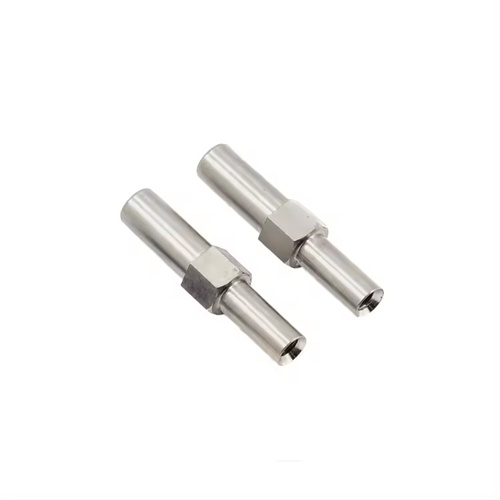
Machining of Partially Hardened Grinding Machine Spindle
The partially hardened grinding machine spindle is a core component responsible for driving the grinding wheel’s high-speed rotation. Its precision directly impacts the machine’s machining quality. This spindle is typically manufactured from high-quality alloy structural steel (such as 45CrNiMoV). To improve wear resistance, key areas such as the journal and tapered surface undergo a partial hardening treatment (hardness reaching 58-62 HRC), while other areas remain in a quenched and tempered state (hardness 220-250 HB). Machining a partially hardened grinding machine spindle presents the challenge of alternating cutting between hard and soft material regions. The hardened areas, with their high hardness and excellent wear resistance, are difficult to cut with ordinary tools. On the other hand, the unhardened areas, with their high toughness and prone to work hardening, require a rational machining process and the selection of appropriate tools and cutting parameters to ensure the spindle’s dimensional accuracy, geometric tolerances, and surface quality.
A rational turning process is key to ensuring the quality of partially quenched grinding machine spindles. The principle of “softening first, hardening later, and zoned machining” must be adhered to. A typical process route is: blanking → forging → annealing → rough turning → quenching and tempering → semi-finishing turning of the non-quenched area → partial quenching → finish turning of the non-quenched area → grinding of the quenched area → final inspection. During the rough turning stage, most of the stock must be removed to lay the foundation for subsequent machining. After rough turning, sufficient machining allowance (typically 3-5mm) should be left on the spindle’s outer diameter and end faces. Quenching and tempering (850°C oil quenching followed by 550°C tempering) imparts excellent overall mechanical properties to the spindle body and improves cutting performance. During semi-finish turning of the non-quenched area, the dimensional accuracy and surface roughness must meet finish turning requirements (dimensional tolerance IT10-IT11, surface roughness Ra ≤ 6.3μm). A sufficient grinding allowance (0.3-0.5mm) should be reserved for the quenched area. Partial quenching utilizes induction heating, precisely controlling the heating range to avoid heating the non-quenched area. After quenching, low-temperature tempering (180-200°C for 2-3 hours) is required to eliminate quenching stresses. Finish turning of the non-quenched area occurs after quenching to correct for deformations introduced during quenching and ensure accurate positioning of the non-quenched and quenched areas.
Machining the quench zone is a challenging aspect of spindle machining on a partially quenched grinding machine, requiring high-performance tools. Since the quench zone has a hardness of 58-62 HRC , ordinary carbide tools are insufficient. Instead, cubic boron nitride ( CBN ) or ceramic tools should be used. CBN tools boast a hardness of 8000-9000 HV , excellent wear resistance, and the ability to withstand high cutting temperatures (up to 1300 °C), making them suitable for continuous cutting of hardened steel. For example, the solid CBN BN-S20 tool can be used for finish turning of the quench zone, achieving a surface roughness of Ra ≤ 1.6μm . Ceramic tools (such as Al₂O₃ -based ceramics) have a hardness of 2000-2500 HV and are less expensive than CBN tools, but they are more brittle and are suitable for low-speed, low-feed cutting. For example , the CC 650 ceramic tool can be used for semi-finish turning of the quench zone. Tool geometry should be optimized: the rake angle should be between -5° and 0° to enhance cutting edge strength; the clearance angle should be between 8° and 10° to reduce friction between the flank and the workpiece; the lead angle should be between 45° and 60° to reduce cutting forces; and the tool tip radius should be between 0.4 and 0.8 mm to prevent tip fracture. When cutting the hardened area, a cooling lubricant (such as extreme pressure cutting oil) should be used to minimize tool wear and workpiece thermal deformation.
Machining in the non-quenched area requires a balance between efficiency and quality, so carbide tools can be used. The non-quenched area is in a quenched and tempered state (220-250HB), has high toughness, and is prone to work hardening. Therefore, the tools must possess good wear resistance and adhesion resistance. For rough turning in the non-quenched area, YG8 carbide tools can be used, as they offer excellent toughness and can withstand high cutting forces. For semi-finishing and finishing, YT15 or TiAlN-coated carbide tools can be used. YT15 offers excellent wear resistance and is suitable for continuous cutting, while TiAlN-coated tools have a high surface hardness that reduces work hardening. Tool geometry parameters: A rake angle of 10°-15° minimizes cutting distortion; a clearance angle of 6°-8° increases tool life; a lead angle of 75°-90° reduces radial cutting forces; and a nose radius of 0.8-1.2mm improves surface quality. Cutting parameters for rough turning are 80-100 m/min, feed rate 0.2-0.3 mm/r, and depth of cut 2-3 mm; for finish turning, the cutting speed is 120-150 m/min, feed rate 0.1-0.15 mm/r, and depth of cut 0.3-0.5 mm. The cutting fluid is an extreme pressure emulsion with a concentration of 10%-15%, which effectively reduces cutting temperature and reduces work hardening.
Controlling form and position tolerances is an important aspect of spindle turning on a partially hardened grinding machine, directly affecting the assembly and performance of the spindle. The main form and position tolerances of the spindle include: roundness of the journal ≤ 0.002mm, cylindricity ≤ 0.003mm; roundness of the spindle taper ≤ 0.002mm, taper error ≤ 0.001mm/100mm; coaxiality between the journal and the taper ≤ 0.003mm; perpendicularity between the end face and the axis ≤ 0.002mm/100mm. To control form and position tolerances, the following measures must be taken: adopt a double-thimble clamping method to ensure the rotation accuracy of the spindle; use a dial indicator to monitor the radial runout and axial movement of the workpiece in real time during turning, and make timely adjustments; perform aging treatment after rough turning to eliminate internal stress and reduce subsequent processing deformation; and use a single clamping method to complete the processing of multiple surfaces during fine turning to avoid positioning errors caused by multiple clamping. For example, when finishing the spindle journal and taper surface in a single clamping operation, the coaxiality error between the two can be guaranteed to be ≤0.002mm. After machining, the form and position tolerances must be checked using precision measuring tools (such as a roundness tester and a dial indicator) to ensure that they meet the design requirements.
