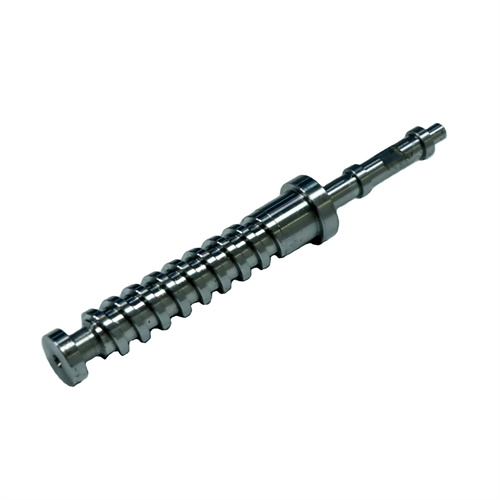
Single-needle thread measurement method
The single-needle thread measurement method is a high-precision indirect method for measuring the pitch diameter of a thread. It is suitable for measuring the pitch diameter of various common threads, trapezoidal threads, and worm gears, and is particularly widely used in production sites and high-volume production. This method involves placing a measuring needle into the thread groove. Using a micrometer or micrometer, the distance from the outer diameter of the measuring needle to the groove on the other side of the thread is measured. The actual pitch diameter is then calculated based on parameters such as the thread pitch and flank angle. The single-needle measurement method is simple to operate and highly efficient, with an accuracy of up to 0.01mm. It meets the measurement requirements of medium-precision threads (such as Grade 6 and 7) and is a key tool for thread processing quality control.
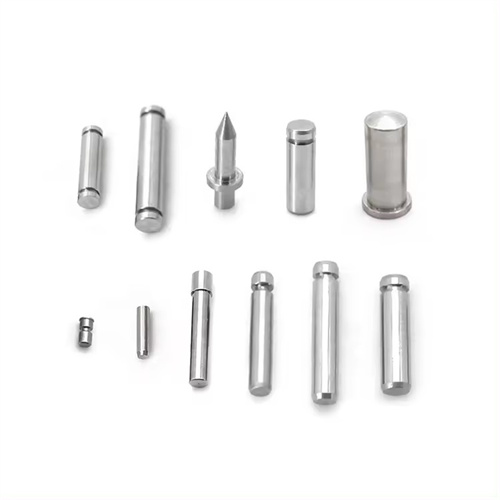
The single-needle probing method is based on the geometric definition of the thread pitch diameter: the diameter of an imaginary cylinder with equal widths for the groove and projection on the thread profile. During measurement, a gauge needle with a diameter of d0 is placed in any groove of the thread. The needle contacts the thread surfaces on both sides, forming two tangent points. The distance M from the outer diameter of the gauge needle to a reference surface on the other side of the thread (such as a shoulder or end face) is measured. The actual pitch diameter d2 of the thread is then calculated using the formula based on the thread pitch P, the flank angle α, and the gauge needle diameter d0. For a common triangular thread (flank angle α = 60°), the pitch diameter calculation formula is: d2 = M – d0 – 0.866P, where M is the measured value, d0 is the gauge needle diameter, and P is the thread pitch. For trapezoidal threads (flank angle α = 30°), the pitch diameter is calculated as: d² = M – d0 – P/cos (α/2) + 2 (d0 – 0.5P tan (α/2)). Substitute the appropriate value for the specific flange angle. This principle allows the pitch diameter, which is difficult to measure directly, to be converted into an easily measurable linear dimension, M, enabling indirect measurement.
The selection of the gage pin diameter is crucial for single-needle measurement and directly impacts measurement accuracy. A gage pin diameter that is too large or too small will cause the contact point between the gage pin and the thread flank to deviate from the mean diameter, resulting in measurement error. The ideal gage pin diameter is one that places the contact point exactly on the mean diameter of the thread. This is called the optimal gage pin diameter. For common triangular threads (α = 60°), the optimal gage pin diameter d0 = 0.577P; for trapezoidal threads (α = 30°), the optimal gage pin diameter d0 = 0.518P. In actual measurement, a gage pin with a diameter close to the optimal diameter specified in national standards can be selected based on the thread pitch. For example, for common threads with a pitch of P = 2mm, the optimal gage pin diameter d0 = 0.577 × 2 ≈ 1.154mm, resulting in a 1.15mm gage pin. The accuracy level of the measuring needle should be no less than Class 3, with a diameter tolerance within ±0.001mm and a surface roughness Ra ≤ 0.025μm to ensure measurement accuracy. The measuring needle is usually made of high-speed steel or cemented carbide, which has high wear resistance and dimensional stability.
Single-needle measurement procedures must be standardized to ensure accurate results. First, mount the threaded workpiece on a measuring stand or center, ensuring the workpiece axis is parallel to the measurement direction to avoid measurement errors caused by workpiece tilt. Next, clean the thread surface and measuring needle to remove impurities such as oil, iron filings, and other impurities that may affect measurement accuracy. Next, place the measuring needle into the thread groove and adjust the position of the micrometer or micrometer so that the micrometer’s stylus contacts the outer diameter of the measuring needle and the reference surface on the other side of the thread. Slowly rotate the workpiece and read the minimum value M on the micrometer or micrometer. (Because threads may have roundness errors, the minimum value is the closest measurement to the true pitch diameter.) Multiple measurements should be taken at different locations on the thread (such as at both ends and in the middle), and the average value should be used as the final measured value M to minimize the impact of thread form errors on the measurement results. For long threads, the M value should also be measured at both ends to check for thread taper error, which should be within 0.01mm/100mm.
Error analysis and precision control in single-needle measurement are crucial for ensuring measurement quality. Measurement errors primarily arise from errors in the needle diameter, measuring tool errors, workpiece installation errors, and reading errors. The influence of needle diameter error Δd0 on the pitch diameter measurement result is Δd2 = Δd0, so needle diameter error must be strictly controlled. The indication error of measuring tools (such as micrometers) should be no greater than 0.002mm and must be calibrated before use. Workpiece installation errors can cause the measurement direction to be non-parallel to the workpiece axis, resulting in cosine error. During installation, a dial indicator should be used to align the workpiece axis with the measurement direction, ensuring a parallelism error of ≤0.01mm/m. Reading error can be reduced by averaging multiple measurements, typically 3-5 times, with the arithmetic mean used as the measurement result. To improve measurement accuracy, a dedicated thread gauge can be used instead of a micrometer. This gauge has a resolution of up to 0.0001mm, significantly improving measurement accuracy. Furthermore, the measurement environment should be controlled at 20±2°C to prevent thermal expansion and contraction of the workpiece and needle due to temperature fluctuations, which could affect measurement results. By strictly controlling various error sources, the single-needle measurement method can achieve a measurement accuracy of 0.005mm, meeting the measurement requirements of most threads.
